

Making Your First Junk Journal from Scratch the Fun and Easy Way
Let’s Talk About What a Junk Journal Actually Is
Okay, before we start gluing and snipping, let’s clear something up. A junk journal isn’t actually junk. I know, it sounds like a mess, but think of it more like a scrapbook’s cool artsy cousin. You’re taking random bits — receipts, tags, pretty paper scraps, old book pages, even fabric — and turning them into something magical. No rules, no perfection, just vibes.
If you’ve ever saved a cute shopping bag because it felt too pretty to toss, or hoarded a ribbon from a birthday gift, congratulations — you’ve already started your junk journal collection without even knowing it.
Gathering All Your Bits and Pieces Before You Start
Before you grab your glue, let’s lay out everything like you’re prepping for a full nail set. No one wants to be halfway through and realize they’re out of topcoat — same thing here.
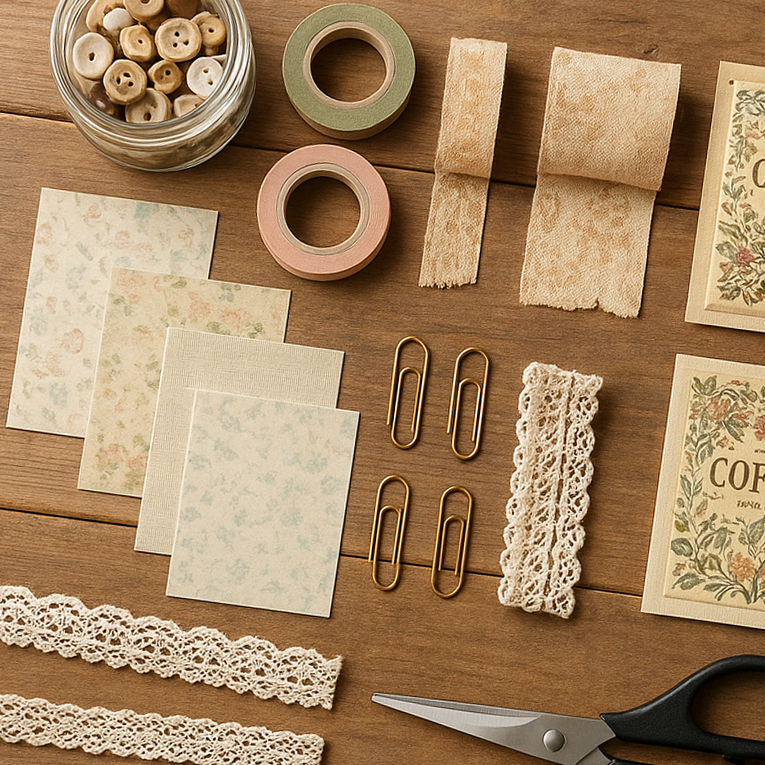
You don’t need to go buy a bunch of stuff. Just poke around your space and pull together what you already have:
- Scraps of pretty paper (magazines, envelopes, old wrapping paper)
- Tags, tickets, or receipts from days you want to remember
- Washi tape, stickers, or labels
- Pages from books or notepads you don’t mind cutting up
- Fabric scraps or lace
- Ribbon, buttons, or charms
- Glue stick or craft glue
- Scissors (bonus if you have those fun edging ones)
You can get fancy with it later, but for your first try, keep it simple. Like starting with gel polish before diving into builder gel — one step at a time, hun.
Finding the Right Base to Build On
This part’s like picking out the shape and length before starting a fresh set. Some people like long and dramatic, others like short and sweet — same with junk journal covers.
You’ve got options:
- An old book (hardcover is great)
- A cereal box or cardboard from packaging
- A plain notebook or composition book
- Handmade covers with thick cardstock
If you’re using a book, carefully cut out the pages with a craft knife so you’re just left with the cover. Don’t worry if it’s a bit scruffy — we’re gonna glam it up.
For a homemade cover, just fold a sturdy piece of cardboard in half, like a little folder. You can cover it in fabric, paper, or even paint it. Give it your own twist — like choosing a nude nail and adding foil, it’s all in the personal touch.
How to Put the Pages Together Without Stressing
Now that your cover’s ready, let’s talk pages. You don’t need to be a bookbinding expert to make this look good. It’s way more chill than it sounds — promise.
Start by picking your page papers. Mix it up — you can use:
- Plain printer paper
- Notebook paper
- Scrapbook paper
- Book pages
- Junk mail that looks cute with a little trimming
Fold each one in half. These folded pages are called signatures — fancy word, easy process. Stack 4–6 folded pages together to make one signature. If your journal is thick, you can make a few and bind them into your cover.
Now for binding. There are a couple of no-stress options:
- Staple Method – Staple your signature right in the middle. Easy, quick, done.
- Elastic Method – Wrap a stretchy hair tie or elastic band around the center of your cover and tuck the signature inside.
- Sewing Method – Poke three little holes in the fold and run a needle and thread through in a simple pattern (in-out-in). Nothing too technical — if you can thread a bead for nail art, you can do this.
There’s no right or wrong way. Do what feels comfy — like when you’re shaping nails and you just know what works for your hand.
Decorating Your Pages with All the Pretty Things
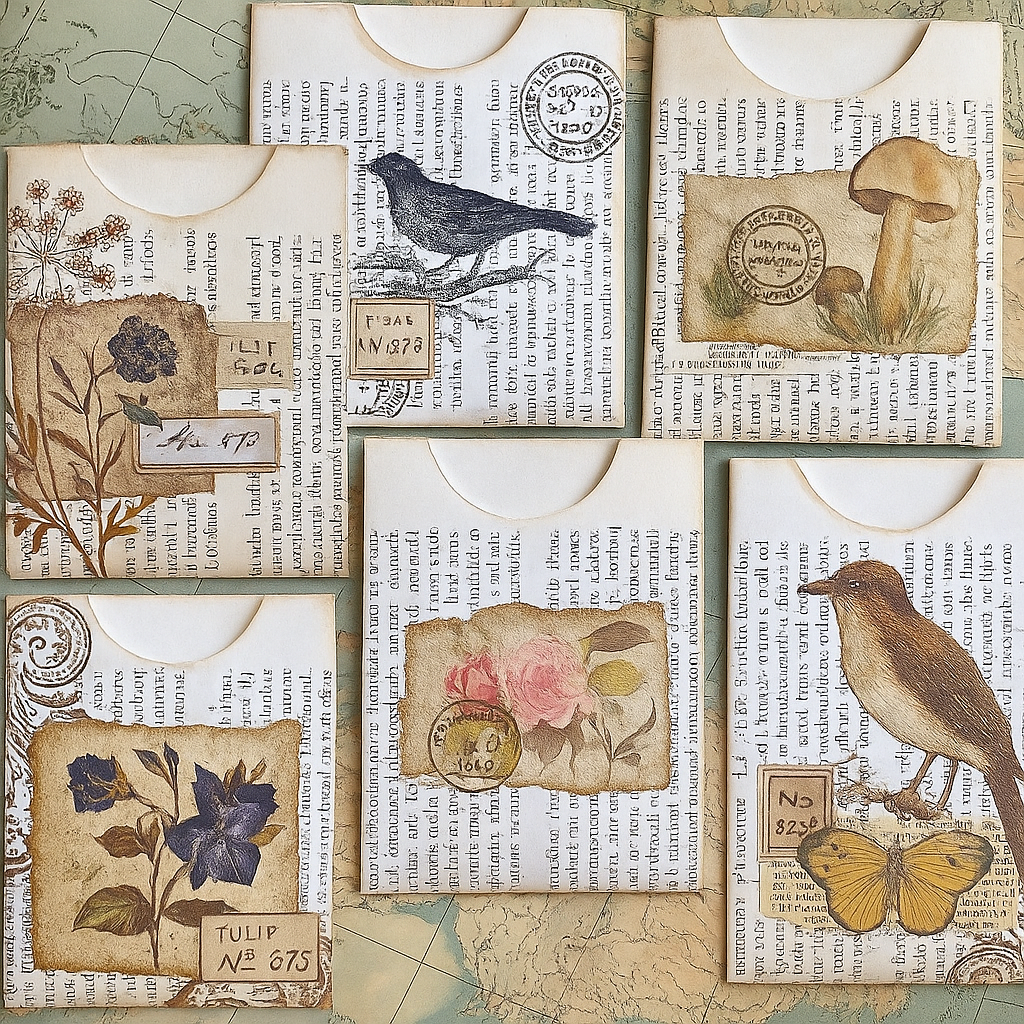
Now here comes the part everyone waits for — the fun, artsy, sprinkle-on-the-glitter step. This is where your junk journal starts looking like a little treasure box.
You’re not aiming for perfection. You’re layering, playing, sticking, taping, scribbling. It’s supposed to look handmade — that’s the beauty of it.
Some ideas to get you started:
- Layer different textures (paper on top of lace, sticker over a page from a book)
- Use washi tape to frame corners or edges
- Glue down a tag and write a little note on it
- Tear your papers instead of cutting for a more natural, soft look
- Doodle or write something on a page — even just a quote or a word you love
Don’t overthink it. Imagine it like nail art — sometimes the most random design becomes your favorite. You’re building layers of memories and vibes, not trying to win neatest journal of the year.
Adding Little Pockets and Tuck Spots for That Extra Touch
You know when you finish a fresh set, and then go back in for that little rhinestone on the pinky or a chrome topcoat — just that one extra detail that makes everything pop? That’s what pockets and tuck spots do in a junk journal.
These are tiny little add-ons where you can slide things in — like notes, tags, old photos, receipts you want to remember, or even a dried flower. And the best part? They’re super easy to make.
Here’s how you can create a few:
- Corner Pocket: Cut a triangle of paper and glue it to the bottom corner of your page, leaving the top open.
- Side Pocket: Take a strip of scrap paper, glue just the bottom and one side, and slide something in from the side.
- Flip-ups or Tip-ins: Tape or glue one edge of a piece of paper so it flips open — kind of like opening a tiny hidden message.
- Mini Envelopes: Make or recycle small envelopes and glue them right onto your pages. Instant cute storage.
You can even layer these. Tuck a note behind a photo, or stick a ticket stub in a pocket with a quote underneath. It’s all those extra touches that make it feel personal — just like when a client gasps because you added glitter to the base coat without even being asked.
Finishing Off and Showing It Some Love
Now that you’ve created your pages, added your pockets, and decorated to your heart’s content, it’s time to seal the deal. Like finishing with cuticle oil and a good hand massage — you’re not done until it feels loved.
Take a few minutes to:
- Smooth out any pages that are sticking
- Add a label or tag to the front if you want to name your journal
- Tie a ribbon or wrap an elastic around it to keep everything secure
- Flip through it slowly and just admire the little details you created
You might spot a smudge of glue or a crooked edge — don’t stress. That’s like the one slightly off-center gem on a nail. It’s handmade. It’s real. It’s you.
If you’re feeling extra, you can even add charms to the spine, stitch a little thread through the binding, or hang a tag from the ribbon. Treat it like jewelry for your journal — nothing wrong with a little sparkle.
Some Real Talk Before You Make Your First One
Let’s have a quick heart-to-heart — no filter, just like when someone sits in your chair unsure about trying long nails for the first time. You might be feeling a little overwhelmed right now. Maybe you’ve looked at photos of other people’s journals and thought, Mine won’t look like that. Guess what? It’s not supposed to.
Your first junk journal is like your first set of acrylics. A little messy, a little experimental, but full of potential. You’re not aiming for perfect edges or Pinterest-level spreads. You’re making something that’s completely your own.
Here’s what I always tell my clients (and now you):
- It doesn’t need to be pretty to be meaningful
- Mistakes are part of the charm
- You can trust your creative eye — even if you think you don’t have one
- You’ll get better each time you try
And if you mess something up? Tape a new piece over it. Layer on top. Cover it with a sticker. Just like filing down a smudge in the polish, you can fix it.
The best part? No one sees this unless you want them to. You’re not doing it for likes, you’re doing it for you. Whether it becomes your place to journal, sketch, plan outfits, store memories — it’s your little world in paper form.
LEAVE A COMMENT


0.0524